Learn how to make your very own 301 redirect generator using just Screaming Frog and Excel.
Today I’m going to show you one of the little tricks in my arsenal that I use regularly when I’m launching a re-designed website. I’ll be showing you how to make your very own 301 redirect generator, using just Microsoft Excel and Screaming Frog.
Screaming Frog has to be one of my favourite bits of kit when it comes to my day-to-day SEO work, it helps automate a lot of mundane tasks by crawling an entire website and pulling through page titles, meta descriptions and even the website structure (which is what we’ll be using it for today).
If you don’t already have it, there’s a free version of the software, available here: http://www.screamingfrog.co.uk/seo-spider/
Step One: Crawl your existing website
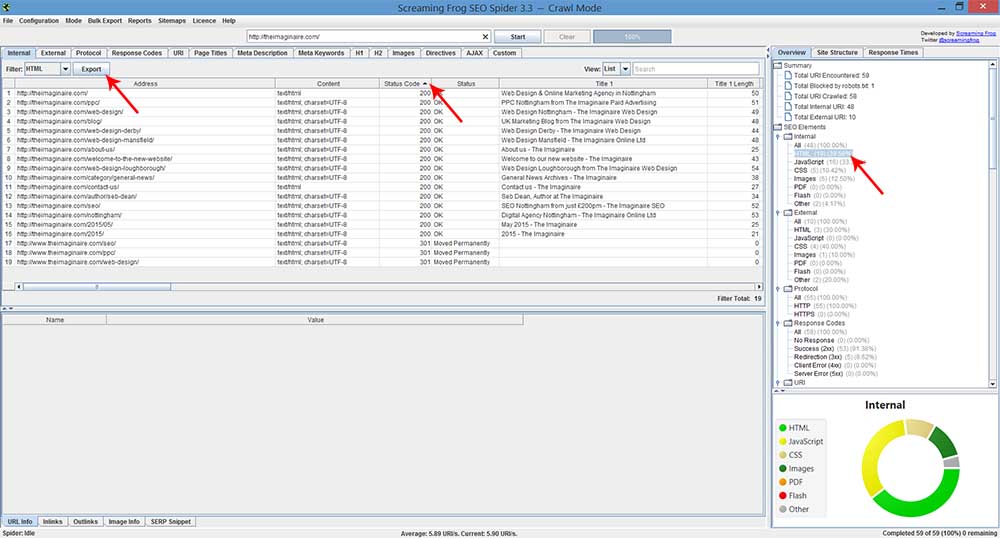
Open up Screaming Frog and type in the website address that you want to crawl, for the purposes of this tutorial I’m going to use my own website.
Simply type in your website address and click start and it will pull up all of the content it can find on your site.
In the right sidebar, go to Internal -> HTML and you’ll see all of the current pages of your website.
Now, go ahead and click the export button and save the file as an xlsx file to your client’s folder.

Step Two: Tidy up the export
Open the spreadsheet in Excel and you’ll see a load of columns that we don’t need. You’ll also see some status codes that we don’t want. Basically all we want to be left with are pages with a status code of 200. Delete the rest.
Once you’ve done that, delete all of the columns except for the ‘address’ column. I delete the column headings rows too, just to simplify things.
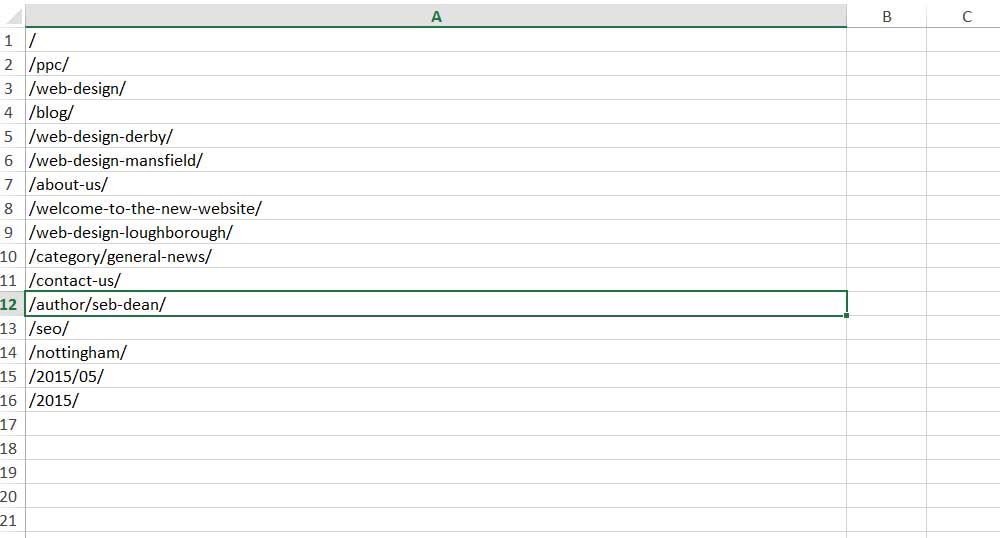
Now, we need to get rid of the URL part of the ‘address’ column. I usually just do a find and replace and enter ‘http://theimaginaire.com’ in the find input and replace it with nothing. You need to keep the leading slash that comes before the page.
That will leave you with something similar to the below:

Delete the row that just has a slash in it, we won’t need to redirect that.
Step Three: Work out where you’re redirecting each page to
Hopefully, when you were planning the redesign, you will have tried to keep the structure as similar as possible to the original if the site was getting good search traffic, so this won’t be too difficult.
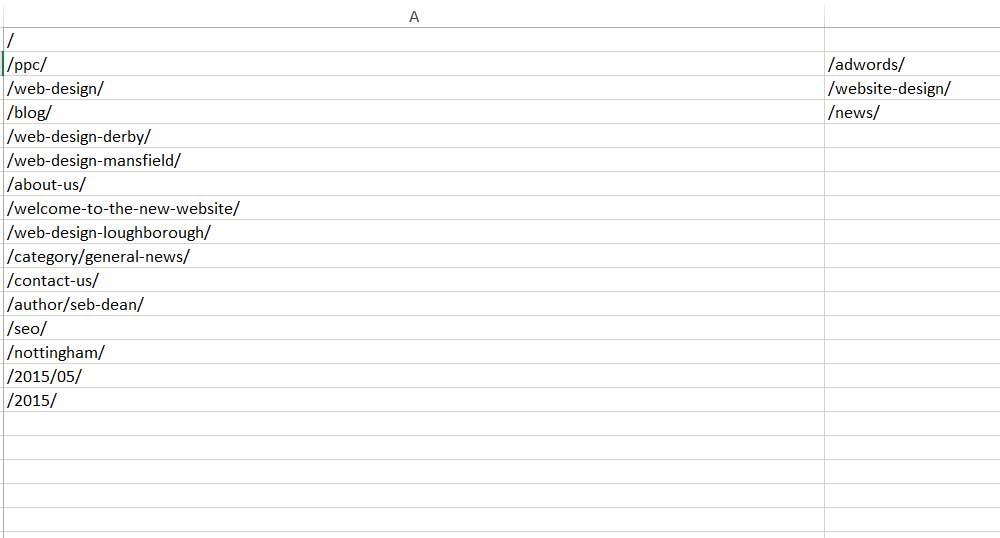
I’m going to show you the example by just doing a few of the pages Screaming Frog found:

Step Four: Make The 301 Redirect Generator!
Ok, so now you have the left column with the original pages that you need to redirect, and the right column with the new pages that you’re redirecting to. So how do you automate creating the redirects?
With a handy function called Concatenate.
What we’re basically wanting to do is put ‘Redirect 301’ at the start of a column and then have columns A and B joined within the same cell, to create our redirect.
Here’s the formula to do that in Excel:
=CONCATENATE(“Redirect 301 “, A1, ” “, B1)
That will leave you with a perfectly formed redirect for that row. Simply click the bottom right corner of the cell containing the formula and drag it down so it creates redirects for every row you’ve got and hey presto, you’ve shaved off a fair bit of the time it takes to build your redirects.
Your final sheet should look similar to this:

Now all you have to do is select the rows and copy them into your htaccess file and you’re done.
Hope you enjoyed this tutorial, if you think it was helpful feel free to comment and share it!
